Advanced Photography Techniques: Understanding the Art and Science of Aperture Priority
From dynamic landscapes to low-light scenes, Michael Smith Fine Art Photography demonstrates how to adapt Aperture Priority Mode for professional results in any environment. Mastering this mode means more than achieving correct exposure — it’s about expressing mood and visual rhythm through light. Discover how to use Aperture Priority Mode for professional fine art landscape photography. Learn the best aperture, ISO, and exposure settings for mirrorless cameras to capture gallery-quality prints.


1. Why Aperture Priority Mode Is the Core of Fine Art Photography
In fine art landscape photography, Aperture Priority Mode (A or Av) provides the perfect balance between technical control and creative freedom.
By setting your desired f-stop (aperture), your camera automatically selects the appropriate shutter speed to maintain accurate exposure.
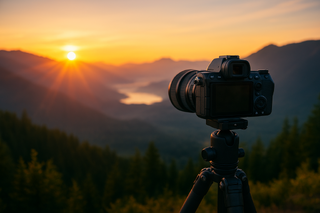
Professional mirrorless systems — such as the Sony A7R V, Canon EOS R5, and Nikon Z7 II — enhance this mode with live histograms and real-time exposure simulations. This allows photographers to focus on light, texture, and mood without constant manual adjustments.
2. The Best Aperture and ISO Settings for Fine Art Landscapes
Aperture shapes the depth of field — essential for rendering both foreground and horizon in sharp focus.
- f/8–f/11: Delivers maximum lens sharpness and fine detail.
- f/16–f/22: For scenes with strong foreground interest.
- f/2.8–f/5.6: For selective focus and artistic shallow depth-of-field compositions.
Start at ISO 64 to 100 for noise-free tonal depth and increase only when light conditions demand it.
3. Focus Techniques for Professional Sharpness
Professional fine art prints require critical sharpness across the frame. Use:
- Manual focus with live view magnification for precise adjustments.
- Hyperfocal focusing — focus one-third into the scene to maximize depth.
- Focus peaking overlays on mirrorless systems for accuracy.
- Back-button focus (AF-ON) to maintain control during recomposition.
4. Exposure Accuracy and Histogram Mastery
Rely on your histogram, not the LCD preview, to ensure correct exposure.
Expose to the right (ETTR) for maximum dynamic range in RAW files without clipping highlights.
Enable zebra warnings to catch overexposure and use a tripod or remote release to eliminate vibration.